

This lesson is made with PSPX9
But is good with other versions.
© by SvC-Design
Materialen Download :
Here
******************************************************************
Materials:
c51ded9a
Element-LilyOfTheValley©BG
GmPA6jNVpvBp6j-aP6XEeBqMa04
misted-LilyOfTheValley
paysage-LilyOfTheValley-©BG
WD- LilyOfTheValley
******************************************************************
Plugin:
Effects – plugin - Mura's Meister – Copies
Effects – plugin - Medhi - Sorting Tiles
Effects – plugin - Vanderlee - Unplugged X – Defocus
Effects – plugin - Unlimited 2.0 - ICNET Filters - Buttons and Frames - 3D Glass Frame 1
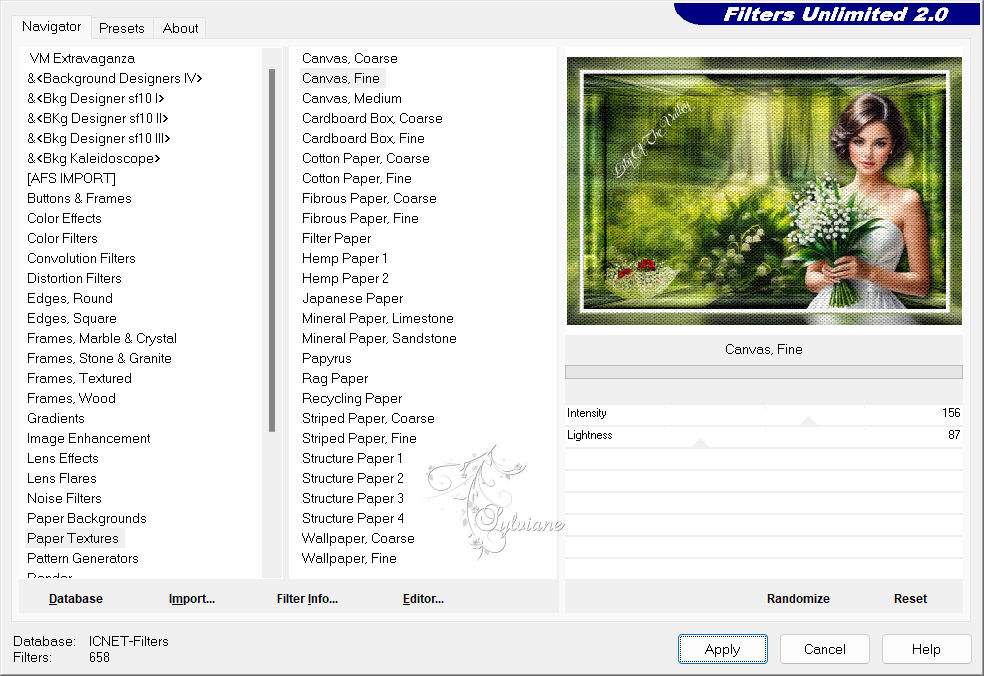
Effects – plugin - Unlimited 2.0 - Paper textures - Canvas, fine
Effects – plugin - Mura's Meister - Perspective Tilling
******************************************************************
color palette
:

******************************************************************
methode
When using other tubes and colors, the mixing mode and / or layer coverage may differ
******************************************************************
General Preparations:
First install your filters for your PSP!
Masks: Save to your mask folder in PSP, unless noted otherwise
Texture & Pattern: Save to your Texture Folder in PSP
Selections: Save to your folder Selections in PSP
Open your tubes in PSP
******************************************************************
We will start - Have fun!
Remember to save your work on a regular basis
******************************************************************
color 1: #8f9a5e
color 2 : #ffffff
1.
Open a new transparent image of 1000x650 pixels
Selections - Select all.
Open paysage-LilyOfTheValley-©BG.jpg
Edit - Copy.
Edit - Paste into selection.
Selection - Select None
2.
Adjust – blur – motion blur
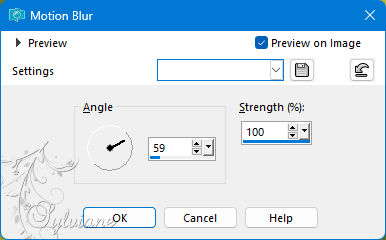
Repeat the effect 4 times
3.
Effects – plugin - Mura's Meister – Copies
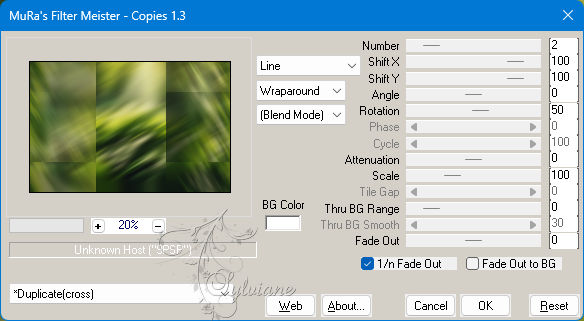
Layers - Duplicate
4.
Effects – plugin - Medhi - Sorting Tiles
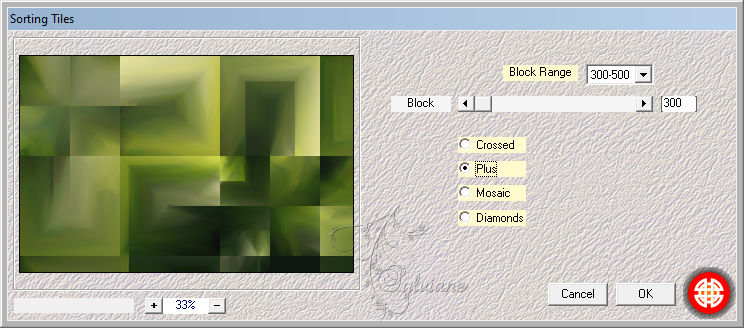
5.
Effects – plugin - Vanderlee - Unplugged X – Defocus
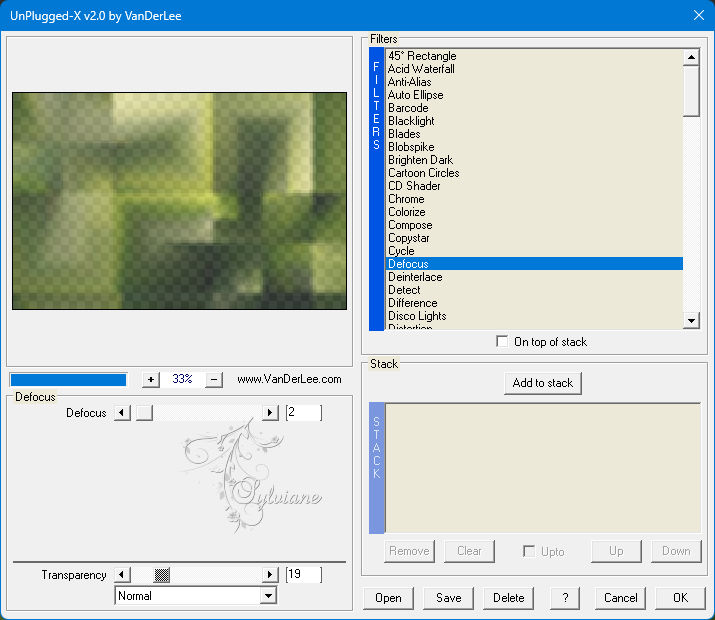
Blendmode : Soft light.
Adjust – scharpness – scharpen more
Layers - Merge - Merge visible layers
6.
Effects – plugin - Unlimited 2.0 - ICNET Filters - Buttons and Frames - 3D Glass Frame 1
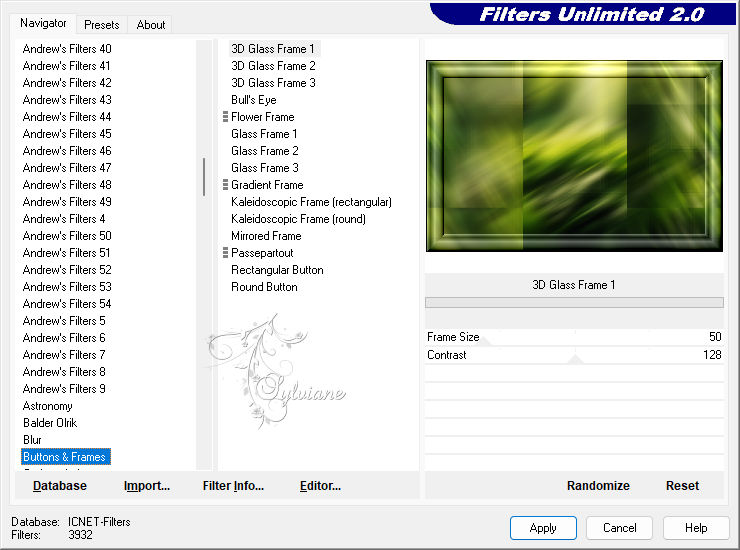
7.
Effects – plugin - Unlimited 2.0 - Paper textures - Canvas, fine
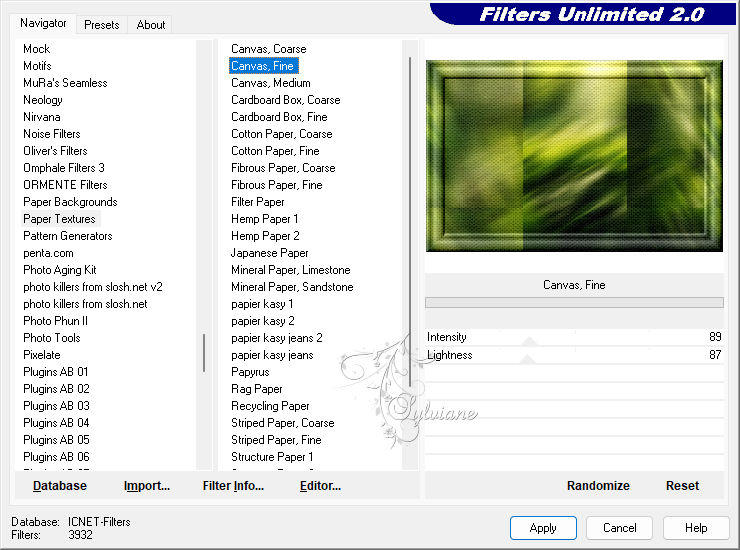
Layers – Duplicate
8.
Effects – plugin - Mura's Meister - Perspective Tilling
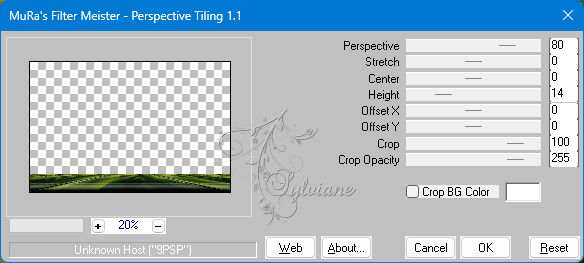
9.
Selection tool (S) - Set this tool as follows

Draw a rectangle

Edit - Cut or the "Del" key on your keyboard.
Selection - Select None
10.
Layers - Duplicate
Image - Mirror - Vertical Mirror
Layers – merge – merge down
Adjust – scharpness – scharpen
11.
Activate the merged layer.
Open paysage-LilyOfTheValley-©BG.jpg
Edit - Copy.
Edit - Paste as new layer.
blendmode: Soft light.
Adjust – scharpness – scharpen
Activate the top layer
12.
Open misted-LilyOfTheValley.png
Edit - Copy.
Edit - Paste as new layer.
Image - Resize -80%
No check mark on resize all layers
Edit - Repeat resize.
Adjust – scharpness – scharpen
13.
Open GmPA6jNVpvBp6j-aP6XEeBqMa04.png
Edit - Copy.
Edit - Paste as new layer.
Activate selection tool (Press K on your keyboard)
And enter the following parameters:
Pos X : 555 – Pos Y : 50
Press M.
Adjust – one step noise removal
Effects - 3 D effects - Drop shadow – your choise
14.
Activate Raster 2
Open Element-LilyOfTheValley©BG.png
Edit - Copy.
Edit - Paste as new layer.
Place this layer as shown in the example.
Open c51ded9a.png choose one
Edit - Copy.
Edit - Paste as new layer.
Image - Resize this layer to 80%.
No check mark on resize all layers
Edit - Repeat resize.
place as in the example
15.
Open WD- LilyOfTheValley.png
Edit - Copy.
Edit - Paste as new layer.
Activate selection tool (Press K on your keyboard)
And enter the following parameters:
Pos X : 79 – Pos Y : 72
Press M.
16.
Edit – copy special- copy merged
Image - Add Borders – Symmetric -10 pixel - color 2
Image - Add Borders – Symmetric -5 pixel - color 1
Image - Add Borders – Symmetric -30 pixel - color 2
17.
activate Magic wand tool - Select border.
Edit - Paste into selection
Adjust - blur - radial blur

18.
Effects – plugin - ICNET Filters - Unlimited 2.0 - Paper Textures - Canvas, fine.
19.
Selections - Invert.
Effects - 3D Effects - Drop Shadow
0/ 0/ 50 /20 - color #000000
Add your signature on a new layer.
Image - Add Borders – Symmetric -1-pixel - color 2
Image - Resize to 950 pixels wide.
Save as JPEG
Back
Copyright Translation 2024 by SvC-Design
------------------------------------------------------------------------------
Thanks to all who created